Russian Rye Sourdough Buns
As I’ve probably mentioned in the past, I have a serious love of rye. It’s my very favorite grain to bake with. Hands down, no contest. What I was looking for from these was a simple, base all-rye that could be done as buns. Sometimes, you just don’t want to have to cut or tear bread at the table, and these are perfectly portioned for each person you’re feeding. This makes only 6 buns, so feel free to double as needed. These buns also freeze nicely.
This recipe functions more like you’re making PlayDoh than bread dough, because I wanted a stiffer dough that could be shaped tall. One of the bigger issues with rye is that due to its particular gluten structure, you really don’t get a lot of rise. The simplest way to fix that, if you want something tall, is to shape it tall. That is easiest with a dough that works more like PD than regular dough. Rather than shaping so as to avoid cracking, I shaped my bun balls to encourage it. There’s something really beautiful to me about the natural cracking of rye loaves, so I nearly always will encourage it. Some other grains also naturally want to crack like this, but rye is really where its at on the cracks front. I particularly loved that these buns had cracks that were more like deep etching, because it allowed every bite to have some textural variance. I also gave these a super long knead so the crumb would be soft and dense rather than open and airy.
By request, I have added US/Imperial measurements as well as volumetric where possible. You should be aware that these conversions may not be as accurate as you’d like. If you’re using a scale, you should be able to switch your scale over to metric for improved accuracy. I have very little space in my kitchen, so I hang my scale on the wall so all my baking is easier!
Here’s what you’ll need
730 grams (7.16 cups, 25.75 ounces) of rye flour
20 grams (3;29 teaspoons) of salt
110 grams (3.88 ounces) of Russian rye sourdough starter
250 grams (8.818 ounces) of water
Let’s make the dough!
Mix all your ingredients together. I generally mix the flour and salt (though prior recipes will make you think otherwise), then add starter and water. Let this rest for about an hour (this is called autolysing). Knead the dough for 50 minutes to an hour. Seriously. I did 50, but I might’ve liked that extra 10 minutes a bit more.
Once your dough is all good and beaten up, go on ahead and rise it. I rose my dough for about 20 hours. You could do this just overnight, or a full 24, or however works with your schedule. My schedule frequently involves walking in the kitchen and saying, “OMG I FORGOT I WAS BAKING!!!!” So there’s that.
TIP: when doing a long knead, I find it easiest to knead in front of the TV. I either sit on the floor of my living room (with a towel or pad under me to catch spills) and watch a TV show, or I sit on the kitchen floor and watch something on my laptop. The time goes by a lot faster and gently that way, so you get some chill time in with your kneading exercise. You are gonna have the strongest arms evar with all this kneading I’m making you do!
Portions of balls of dough, oh my!
Time to shape!
I won’t normally tell you to use a scale for shaping, but with buns it’s really the right way to do it. Don’t think for a minute that I don’t eyeball this most of the time. For y’all, however, I’m willing to weigh, because I love you enough to be less of a lazy baker! So grab your scale. You forgot to put it away after mixing the dough anyway, right?
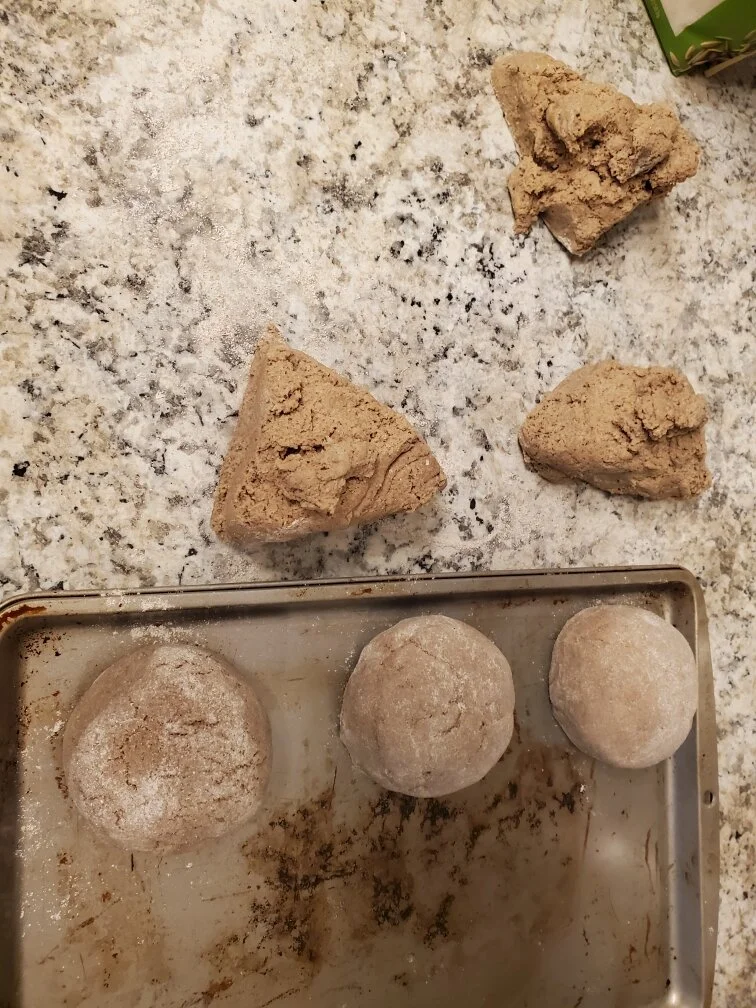
Divide your dough into 6 205-gram portions. Once you’ve done that, you are basically going to smash them into PlayDoh balls. Make ‘em tall. Get creative!
Once they’re done and on your tray, give them about a 6-7 hour rise. Again, this is rye so you don’t have to (they’re not really gonna grow much), but it will better develop the flavor (that’s why we do all this, yeah?).
Here’s what they look like finished - note that I did not ensure these balls were smooth. That’s on purpose so they crack better
Bake time!!
I’m so excited! Heat your oven to 400F/200C/gas mark 6, and then toss the tray of buns in. It should take about 40 minutes, though honestly you could leave them in longer or just shut off the oven at 40 and let them hang out in the cooling oven. If you want a lighter crumb than what I’ve made (and sometimes you might!), give them another 10 or so in the oven (or 30 in the cooling oven).
And now its nom nom nomivore time!
The little lovelies remind me a lot of the bread version of macarons de Nancy. Which is a cookie that’s dear to my heart.


